Congratulations on purchasing your first DIY Score Tower kit. This how-to guide should get you up and running in no time.
This will outline our recommended approaches to putting it all together. Feel free to deviate, but at your own risk. If any of these techniques are new to you, consult a professional, watch some YouTube videos, and definitely run some tests first.
If you've elected to do the stain and finish on your own, here's some guidelines on how to do it right.
Like all things in nature, wood isn't perfect. There will likely be small defects in the wood, especially around the edges. Take some wood filler and fill in any voids that you see.
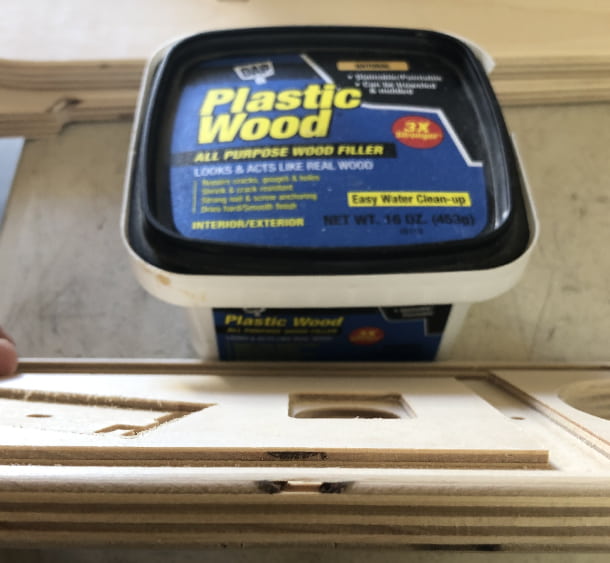
With 220 grit sandpaper, remove all of the excess wood filler, knock down any splinters, and hit all of the surfaces to get that perfectly uniform finish.
Once the surface is prepped, decide on what color stains you want to use and where to put them. We recommend staining each axis a separate color, but it's totally up to you.
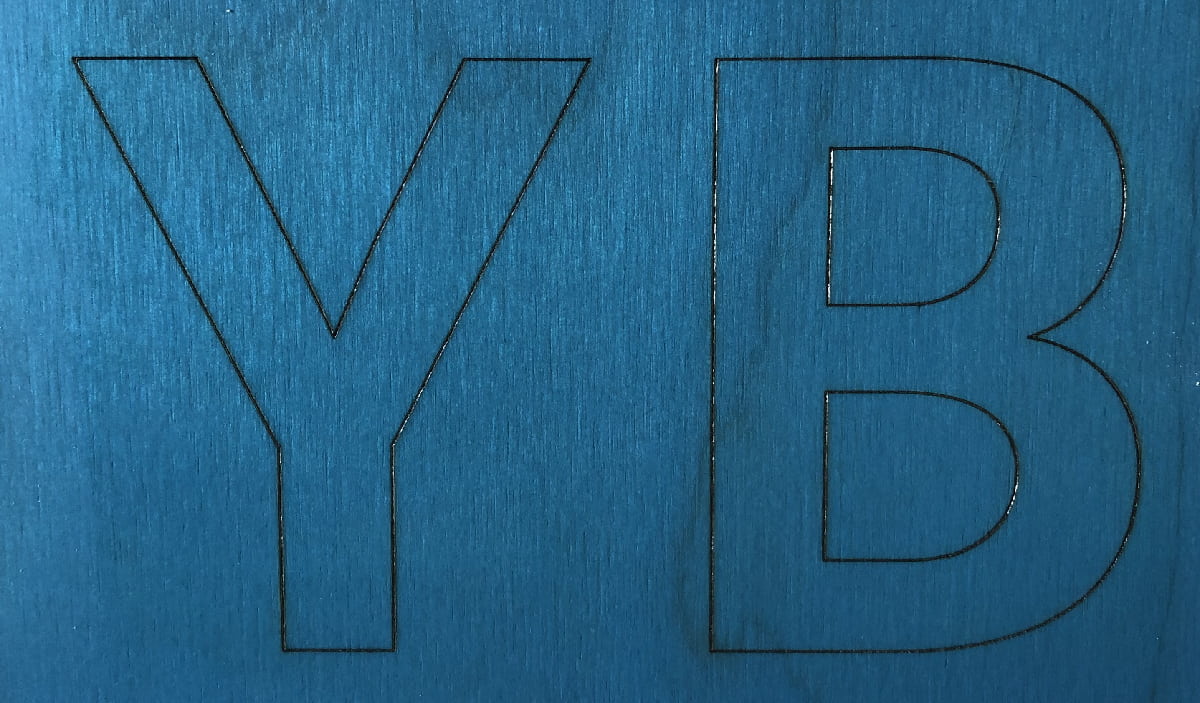
In order to stain the logos without the stain bleeding, it's highly recommended that you use gel stains instead of oil stains. Oil stains are designed to bleed which makes them easier to apply, but harder to be accurate. Oil stains can be used with tiny paint brushes, patience and skill, but definitely practice on some scrap wood first. We ask that you stain the “Y” and “Yore” lighter than the “B” and “Board”, but hey, it's yours, do as you will.
Before staining the logos, you need to apply some form of wood sealer to the lasered lines. We recommend MinWax Polycrylic, but whatever you plan on protecting the wood with should be fine. You'll want to apply it liberally so that it can soak into the wood, but make sure to wipe off the excess so that it doesn't peel up with the mask. Let it dry thoroughly.
When doing the logos, you'll want to apply the darkest color first. Carefully peel up the portion of the mask that you want to apply the stain to, lightly sand off the splinters, and carefully apply the stain. Wipe off all of the excess stain, let it dry thoroughly, and then with a brush, apply a coat or 2 of whatever finish you're planning on using.
* It can't be overstated how important it is to not apply the stain too liberally, IT WILL BLEED if you're not careful. Same for the finish. If it's too thick and/or hasn't cured properly, it will peel up when you remove the mask.
After the finish has cured, peel up the mask to uncover the wood for your next color. Repeat, taking care not to get the stain on the areas that you've already stained as well as the areas that don't have mask.
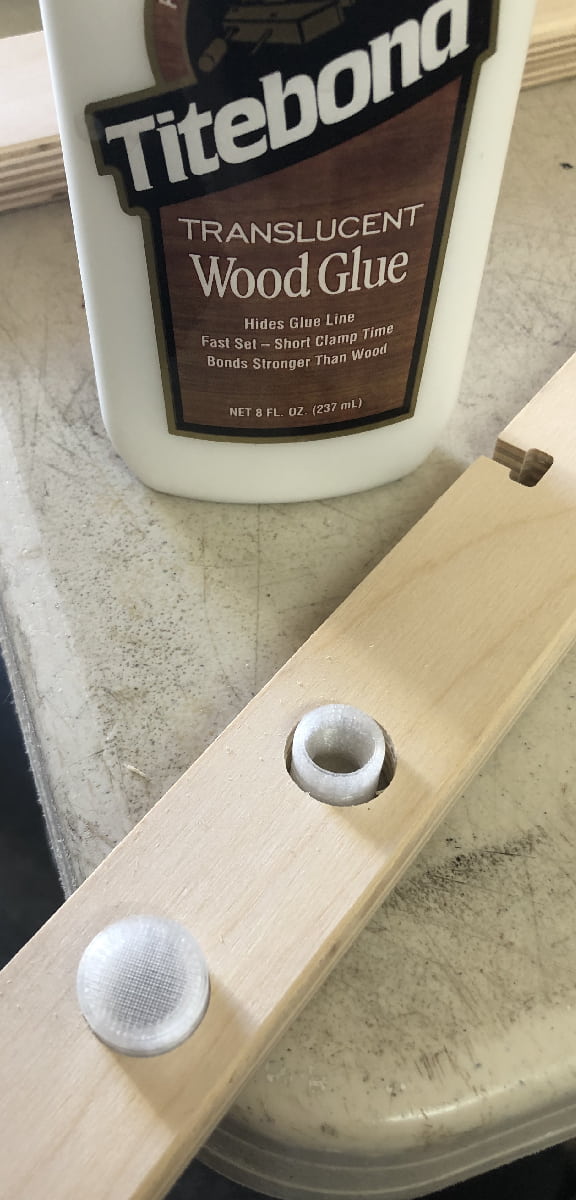
After all of the stain has dried, it's time to install our LED Mounts.
* The caps will inevitably have some resin residue on them. Use latex gloves while handling them.
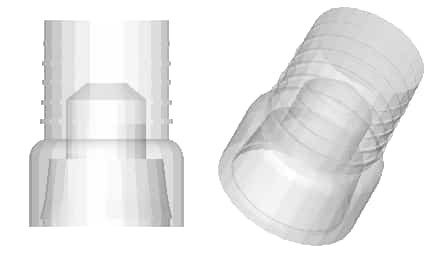
The caps are manufactured with ribs that help them bite into the holes and hold the glue. It is highly recommended to run some tests with your setup to make sure the hole size is perfect. They should work perfectly with any Forstner bit set, but there's always a chance of manufacturer variation. The goal is to get the caps to sit both flush, and tight with only your fingers. You should be able to remove them, but not too easily. It is recommended that the caps be installed after the design work is complete and a seal coat has been applied. Bear in mind that applying the poly first can make the holes a hair smaller, so you want the caps a little loose prior to Poly.
When installing, you'll want the "face" (wherever the lens will be) of the wood up towards you. Place a few pieces of scrap under the wood to give the caps room to go through the holes (nothing that can scratch the surface). Put a bead of transparent wood glue around the entirety of the bottom rib of the cap (about ⅔ the way down from the lens). You should be able to set the caps by hand, but some may be stubborn. If so, set a piece of scrap wood on the caps and tap them with a rubber mallet to get the caps flush with the wood. (Sand or otherwise round over the edges/corners of the block so it doesn't mar the wood) You'll want to wipe off the excess glue with a damp rag as soon as you can.
* If a cap goes in too deep, make sure you support the veneer with a block of wood when you pop it back out so that the wood doesn't delaminate or chip.
There are also 4 caps that need to be installed on the support spine. These lights are used for ambiance. * IMPORTANT: You need to alternate their orientations as shown below. Otherwise, the LED strands will not reach. It's not important which is which, just that they alternate.
After the glue dries, test the caps by lightly pressing on them. If any are loose, reinstall them with more glue.
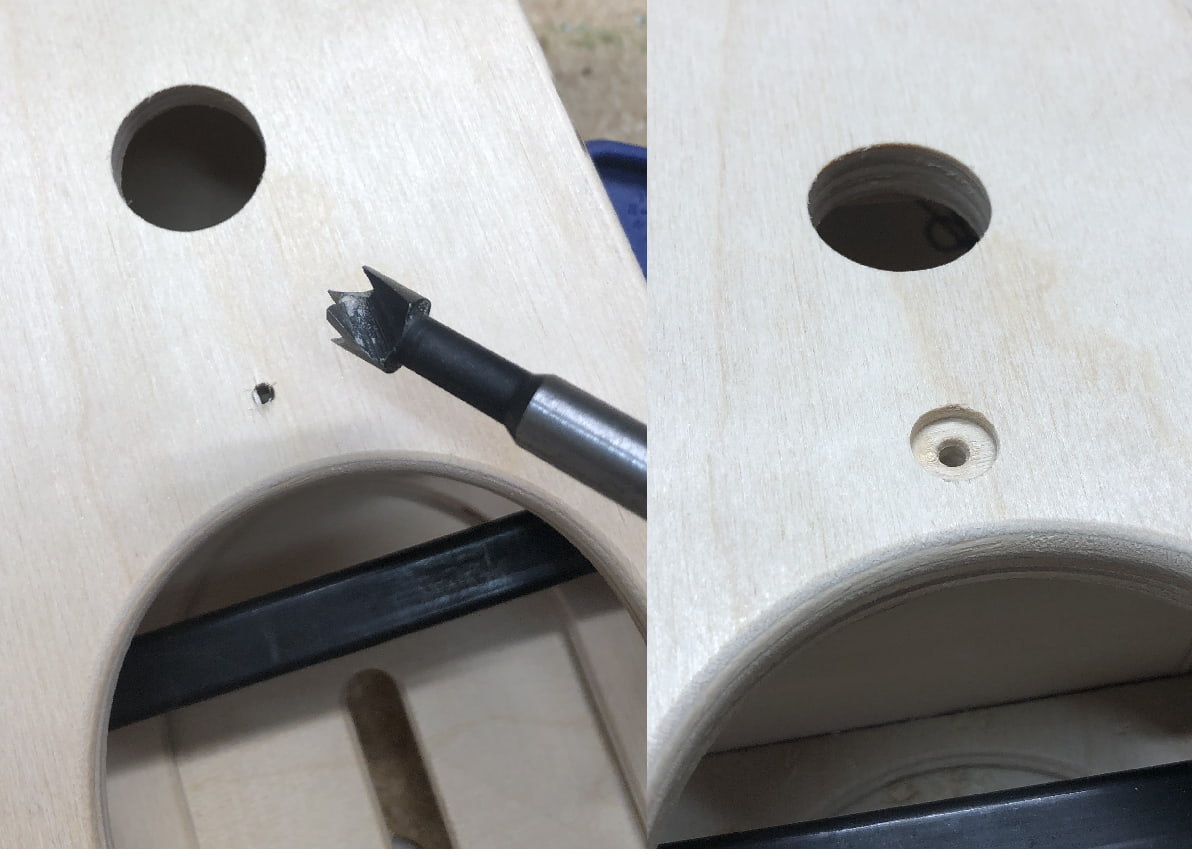
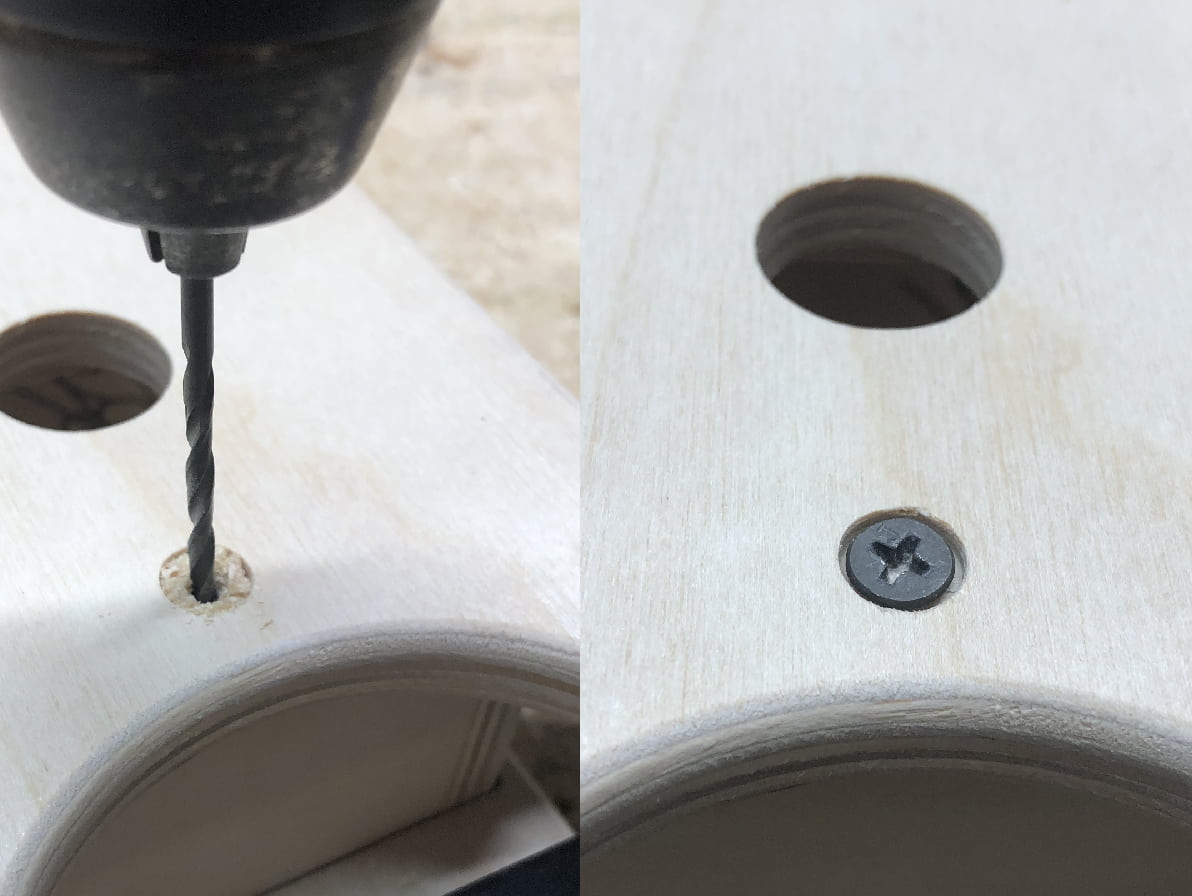
Carefully add a countersink to the mounting points for the lid with a 5/16” Forstner bit.
After the glue has had some time to cure (an hour is usually fine). We recommend using MinWax Polycrylic to seal in the stain and protect the wood for years to come. If you have access to an HVLP gun, that's the recommended approach, but you can also apply finish with foam rollers or a brush.
Let's put it all together.
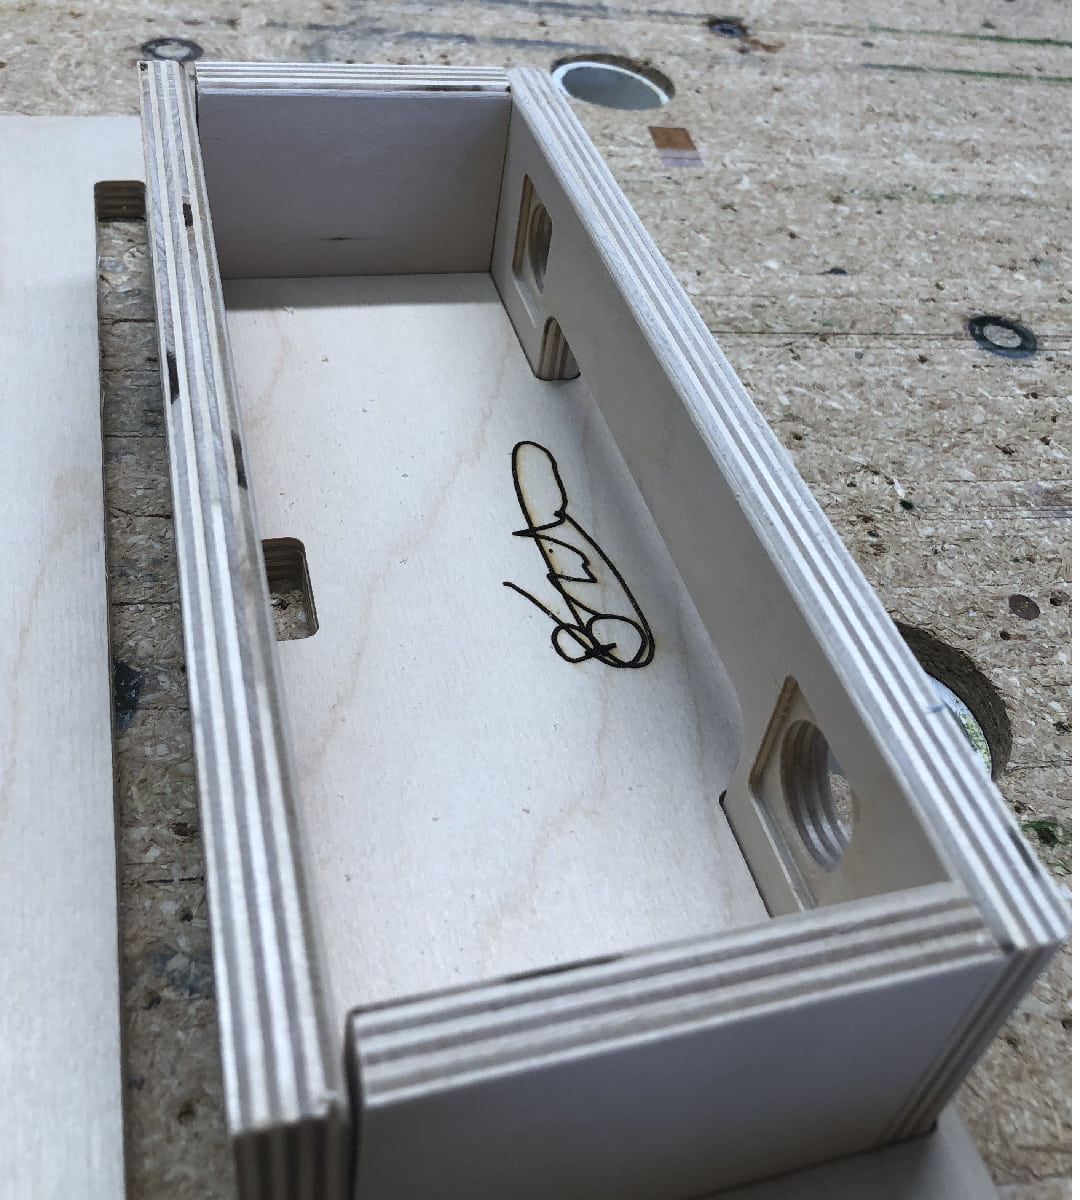
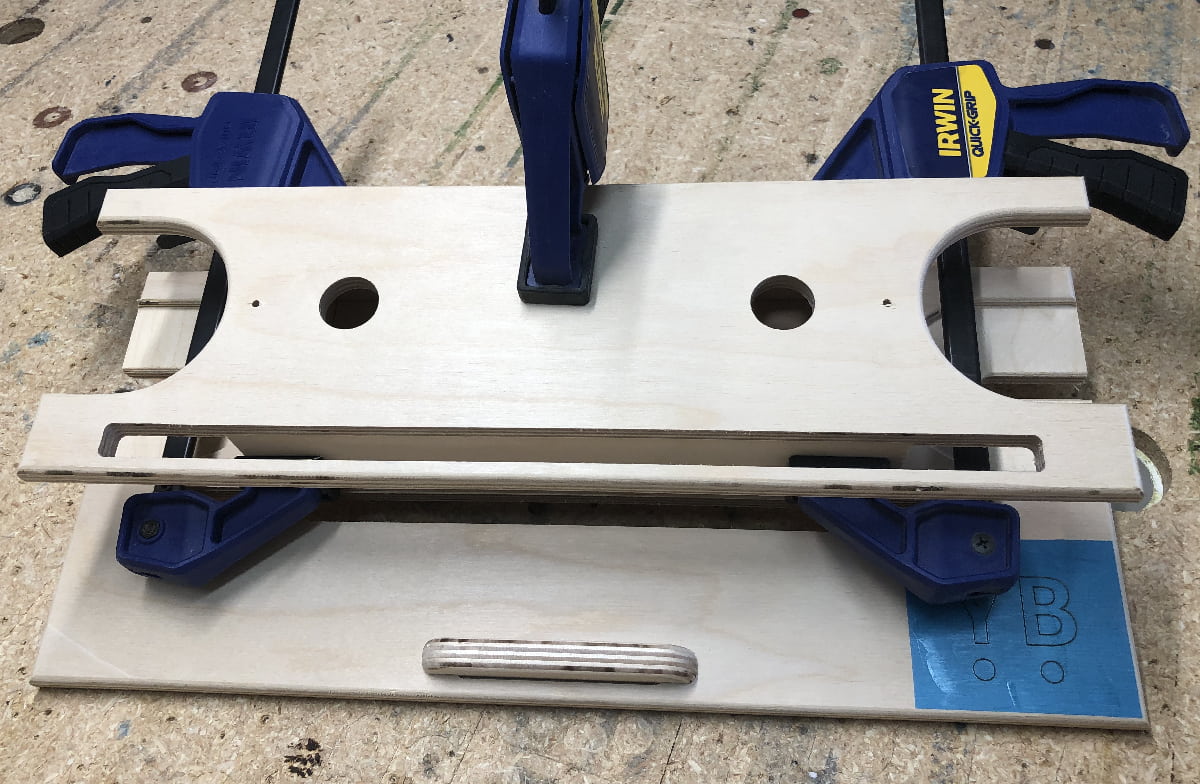
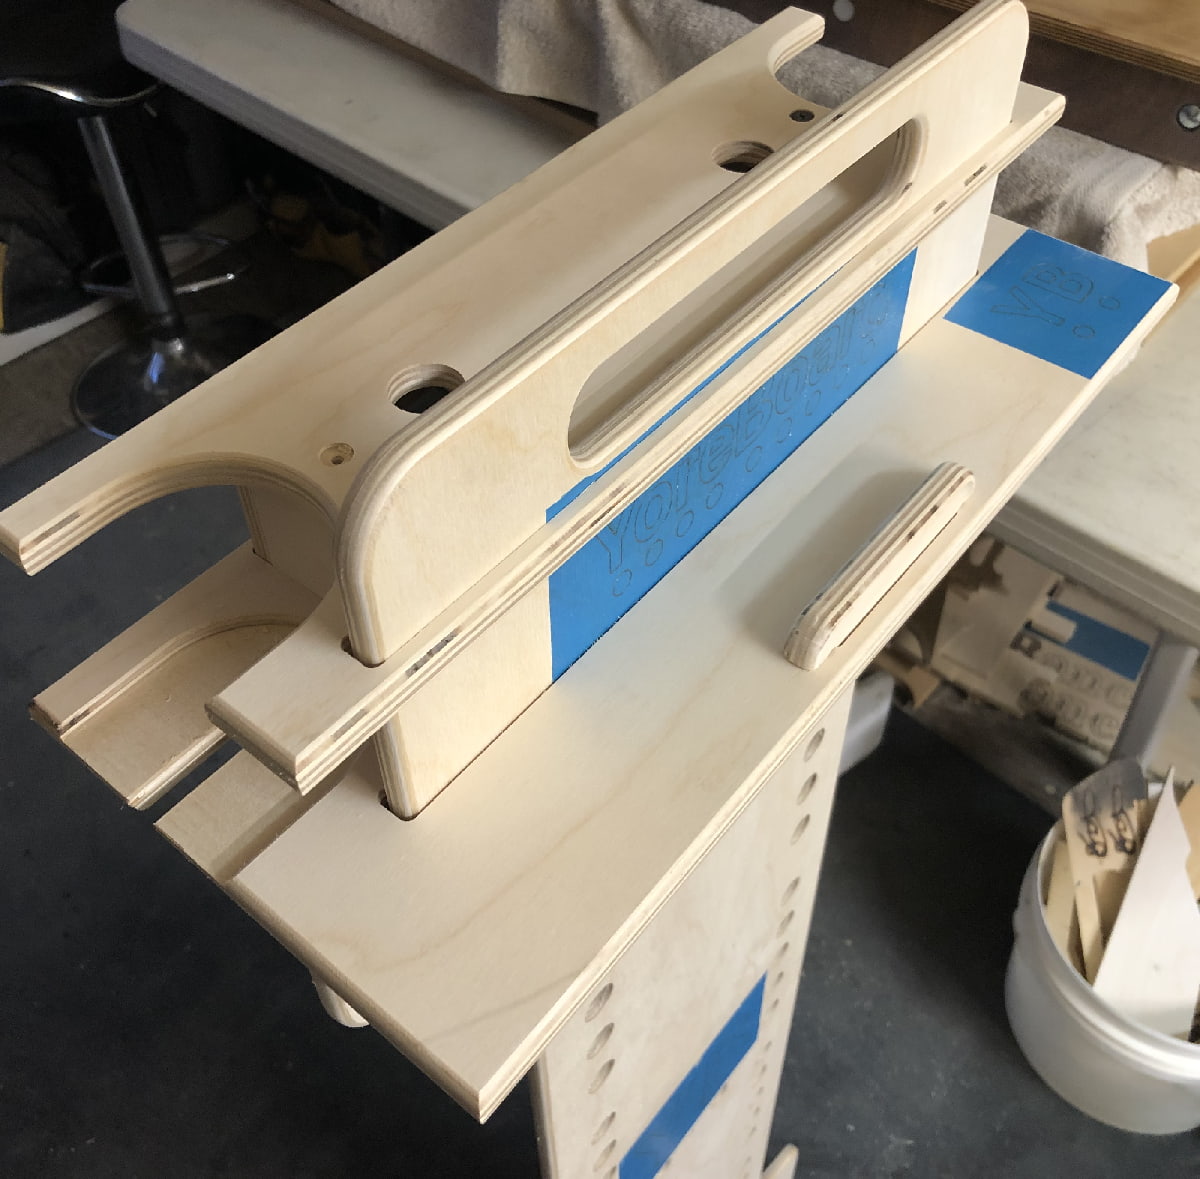
Refer to the image below.
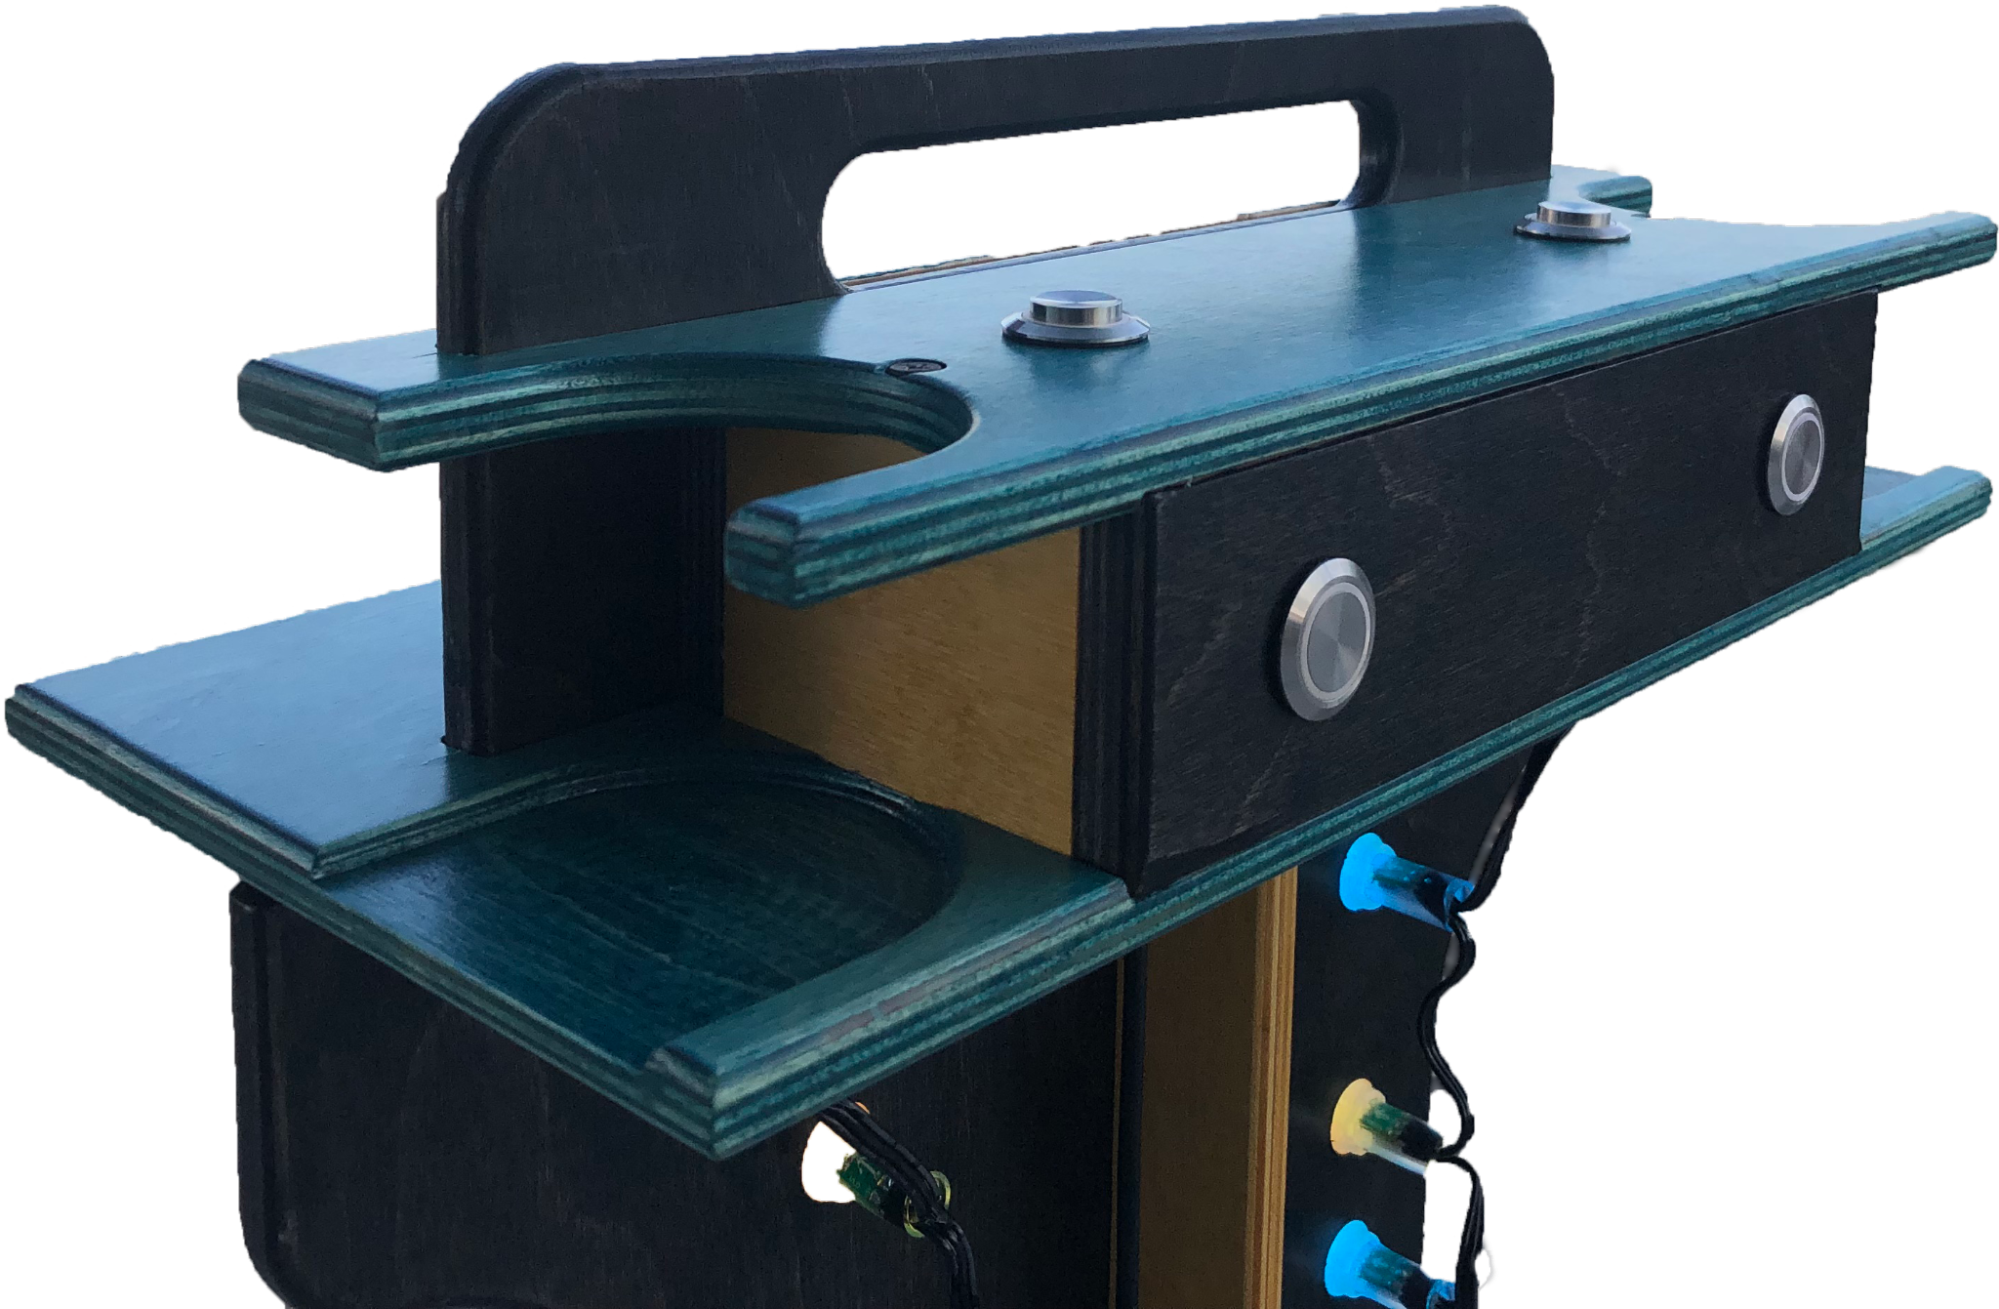
Each of the 4 walls has a rounded over edge that helps the lid sit in place. These will be at the top of the walls. Also note the orientation and locations of the holes for the buttons. Do a dry assembly before applying any glue.
Once you understand how it goes together, add glue to all of the joints and reassemble the box.
DO NOT GLUE THE LID ON
Clean off all of the excess glue with a small wet brush, dry it off, and then set the lid in place to get that perfect alignment.
Clamp it all together and let the glue cure.
Now carefully drill pilot holes deep enough for the 1” screws into the box with a 7/64” drill bit. Screw the lid on with a screwdriver and let the glue dry. Make sure the wood doesn't start to split.
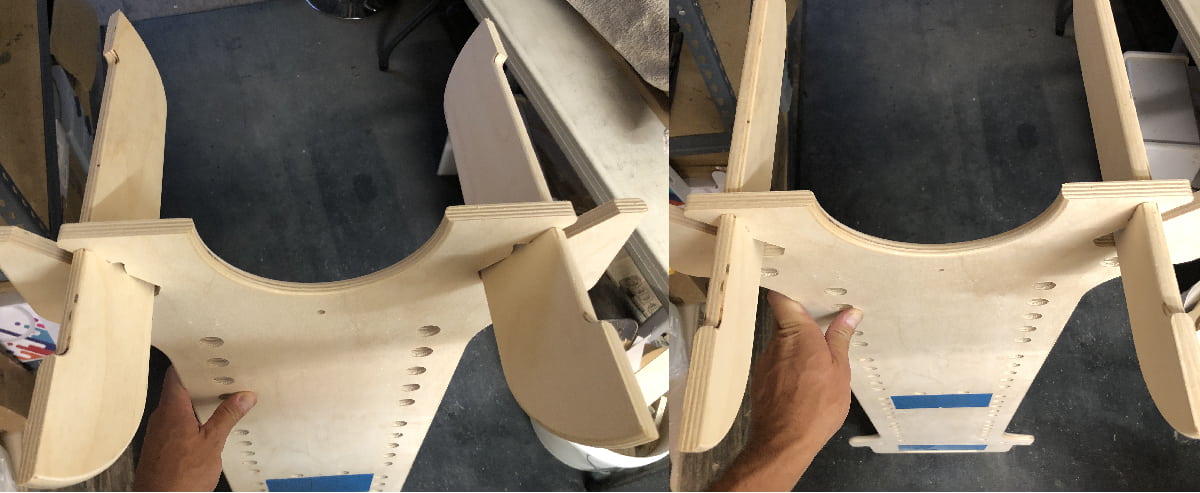
While we wait for the glue to cure, we can assemble the base components. Take the 2 feet and put them into the bottom of the base as shown below. The long ends of the feet should come out the back side of the tower. Then rotate the legs into position until they lock.
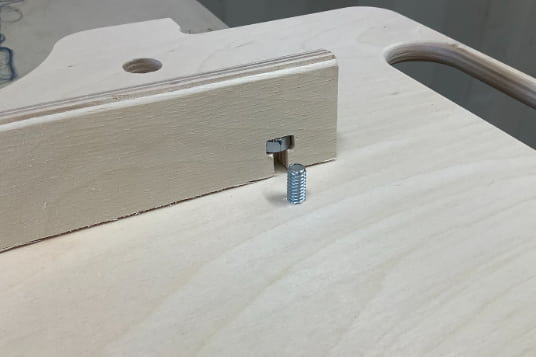
Now let's get the spine installed. Place the nuts into the T-slots of the spine. Align the spine with the holes in the tower (with the flat side at the top of the tower) and install the machine screws. Don't overtighten.
After the glue has had time to cure, remove the lid. We can now start installing the buttons and the circuit board.
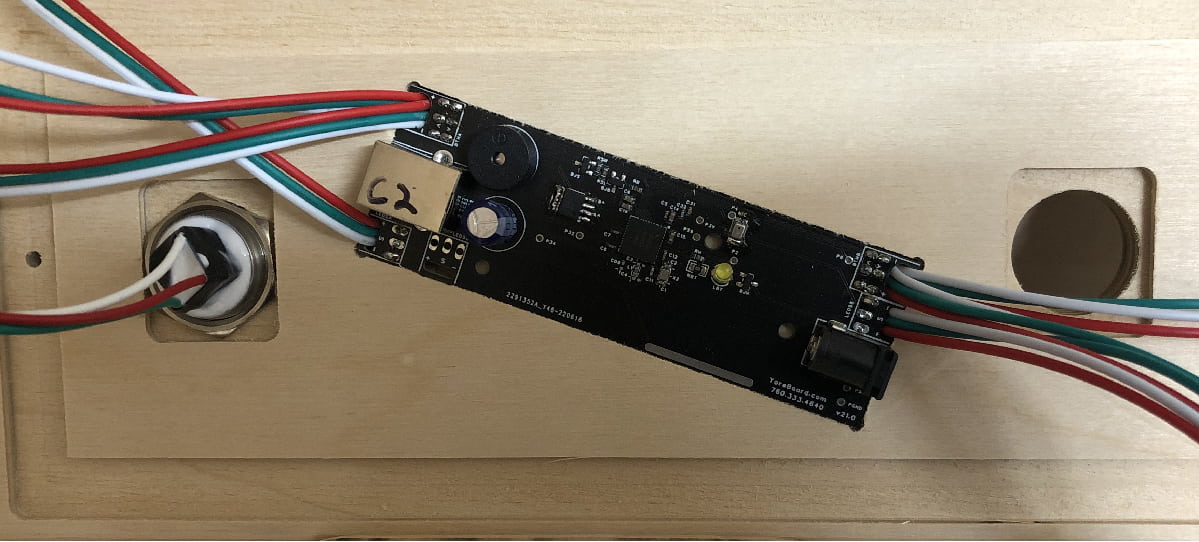
Screw the Circuit Board into the wood with the 3 small screws. Pay attention to the cutouts in the circuit board pocket so that you don't install it backwards.
DO NOT OVERTIGHTEN.
They don't need to be tight at all, just tight enough to hold the circuit board in place.
Remove the nuts from the buttons, insert the buttons into the holes, and then reinstall the nuts as shown. These also don't need to be very tight. Just enough so that they don't wriggle loose.
The flat buttons are intended to be used as the “down” buttons and should be installed into the back wall of the box. The “Up” buttons should be installed into the Lid.
Connect the USB cable, and the buttons to the circuit board. Plug in a power source and an LED strand and verify that the up buttons are correctly connected. The LEDs should increment as you push the button. Same with the down buttons, only the opposite.
* The system is capable of supporting additional 5V LEDs to illuminate the cornhole board and/or the surrounding area. Let us know if this is something you're interested in adding and we'll walk you through it.
Now let's put the box back together. Disconnect the LEDs, run the USB cable out of the power pack slot, and run the LED connectors out of the bottom of the box. Install the screws to the lid of the box.
Your new score tower is designed to break down for easy transport and storage. Simply slide the box onto the top of the tower. Be mindful of the LED connectors that are sticking out of the bottom.
Identify the end of the LED strand that has the connector on it and plug it into the electronics box. Go ahead and plug the USB cable into your portable USB power supply too so that everything fires up. Slide the power supply into the box.
If the LED mounts are sufficiently glued, there shouldn't be any issues, but be mindful and support them with your hands.
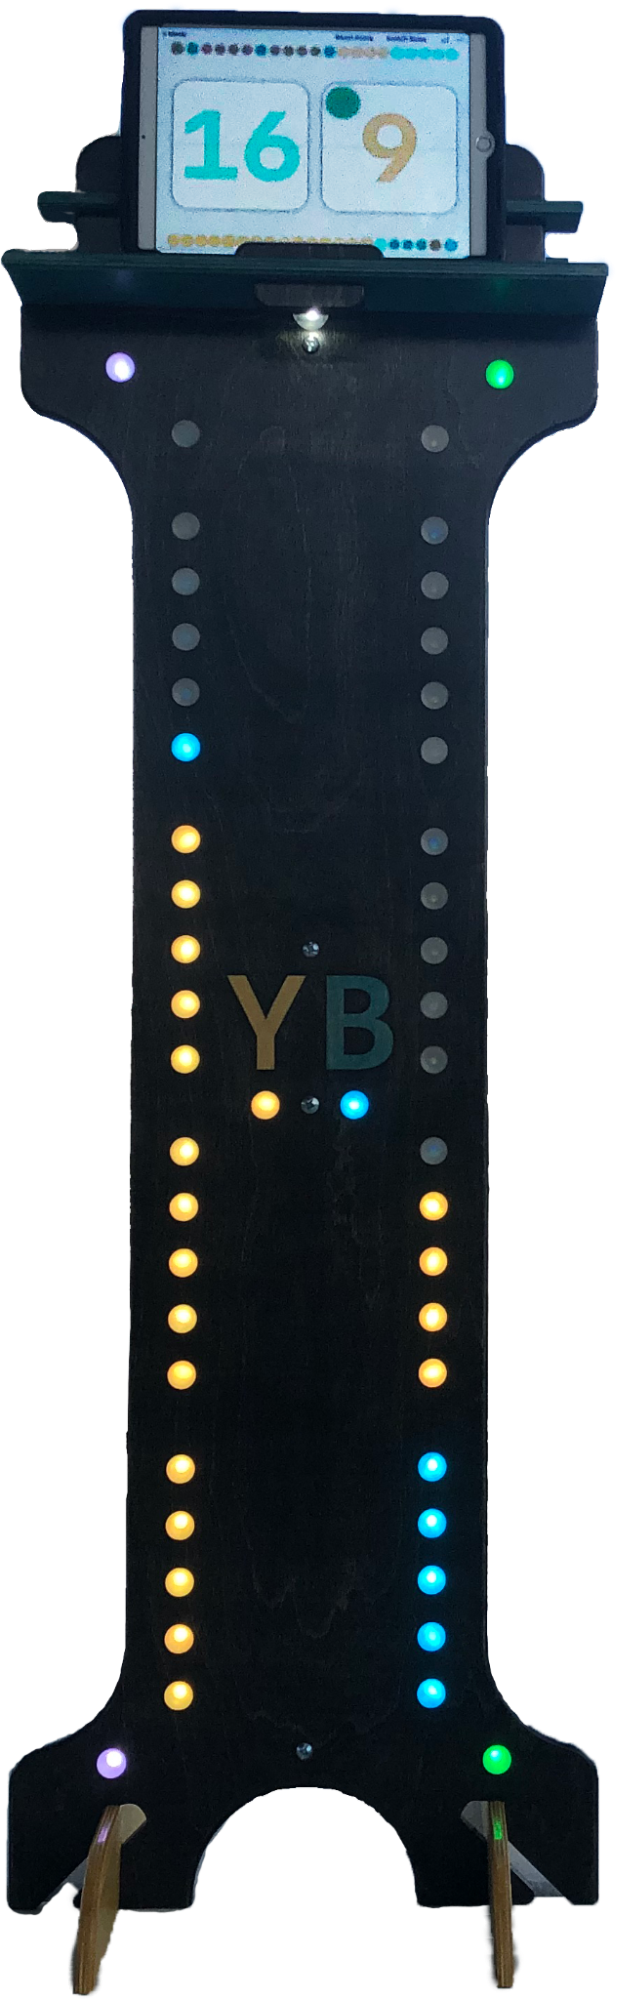
Gently install the first LED by pushing it into the mount and work your way down the tower. When you get to the ambient LED mounts in the spine, run an LED to one of those mounts. The ambient LEDs should be the only ones lit up if the score is 0-0. Similarly, when you get to the mounts in the center of the tower, run an LED to one of those mounts as well.
And that's it!
Please refer to the online help guide for a crash course in using the scoreboard.
Don't hesitate to reach out if you have any questions or suggestions. We genuinely want you to succeed and to be as happy with our products as possible.
We'd also love to see the finished product. Please shoot us some pictures if you're up for it. And obviously, we'd really appreciate you sharing with your friends and family on social media, or leaving us a review in Google or in the app stores.
Thank you for your support. Enjoy!